
Dashboard User Guide
An overview of the new Dashboard, released January 4, 2024.
Accessing the Dashboard
Invitations
If you are already a Utility Cloud customer, you can access the new Dashboard using your existing username and password.
If you are a new user, you will be invited to use the Dashboard by either an Arcadia representative or by a fellow teammate. If you don’t have an Arcadia representative, please contact our team via this form. When you are initially invited, you’ll receive an email with a link to set your password in the Dashboard. Click the link to set your password. At this point, you should be able to login to your Arcadia Dashboard.
Logging In
Navigate to dashboard.arcadia.com and enter the username and password that you’d previously set in order to log in.
Password Reset
In general, you can always find a reset password link on the Dashboard login page, where you can reset your password in case you lost your previous one.
Overview Page
The Overview Page is the first page you see when logging in to the Dashboard and is intended to help you navigate quickly to where you need to go. It consists of Shortcuts and Resources.
Shortcuts
Shortcuts are links directly to pages within the Dashboard for common tasks such as adding new credentials or configuring Connect.
Resources
Resources are links to product documentation that you might find useful as you build out or expand your integration.
Data Ingestion
The platform can ingest statements in two ways: Connect or the Bill Uploader.
Connect – we will automatically collect the bills directly from the provider’s website on an automated basis
Bill Uploader – where you can upload bills that you have received from the Provider
Connect
- Navigate to the Credentials tab within the Org Configuration page. You can get there by either clicking the Shortcut on the Overview page or by clicking the gear icon in the top-left and then Credentials.
- Click "Add Credential "
- Select the provider and submit the username and password
- You’ll immediately see the Credential show up in the Credential table
- You can optionally add a correlationId to the Credential which will be inherited by all Accounts, Statements, and Meters that are discovered within those Credentials.
Bill Uploader
- Navigate to the Bill Uploader tab within the Org Configuration page. You can get there by either clicking the Shortcut on the Overview page or by clicking the gear icon in the top-right and then Bill Uploader.
- Click Upload bill
- Drag and drop or select the bill to upload
- Click "Upload Bill
- You’ll immediately see the Bill show up in the Bill table
Today, there is no way to assign a correlationId to the Statement, Account, and Meters discovered on that bill through the Dashboard.
Finding data
Data tables
There are a number of different types of tables that you could leverage within the Dashboard:
- Meters
- Sites
- Statements
- Accounts
- Credentials
- Bills
Filtering
All of the tables within the Dashboard have the ability to advance search and filter. You can activate this ability by clicking within the basic filter box at the top of the page or switching to query mode.
Sorting
Tables within the Dashboard have the ability to sort by specific columns in the table. Not all columns are sortable, however, the columns that are sortable have an arrow next to the column name. Click the arrow to reverse the order of the sort. In query mode, you would use RSQL to determine sorting.
Data downloads
Default CSV Downloads
In addition to API access to data, you can always easily download data in the default CSVs from the Dashboard. Please note that the data included in the CSV is not as rich as the API. Detailed meter usages and charges are omitted from the CSV for the sake of simplicity. CSV downloads include summary-level usage and charges on a Meter or Statement basis.
Download options
There are 5 default download options: Meter usage, Account's Statements, Sites' usage, Statements and Interval data.
- Meter usage: high level usages, charge, and meter information across all Meters
- Sites' usage: high level usages, charge, and meter information across all Meters associated with each Site
- Statements: high level Statement information only
- Account's Statements: high level Statement information across each all Accounts
- Interval data: Granular energy usage information for a meter
Example of utilizing default CSV downloads
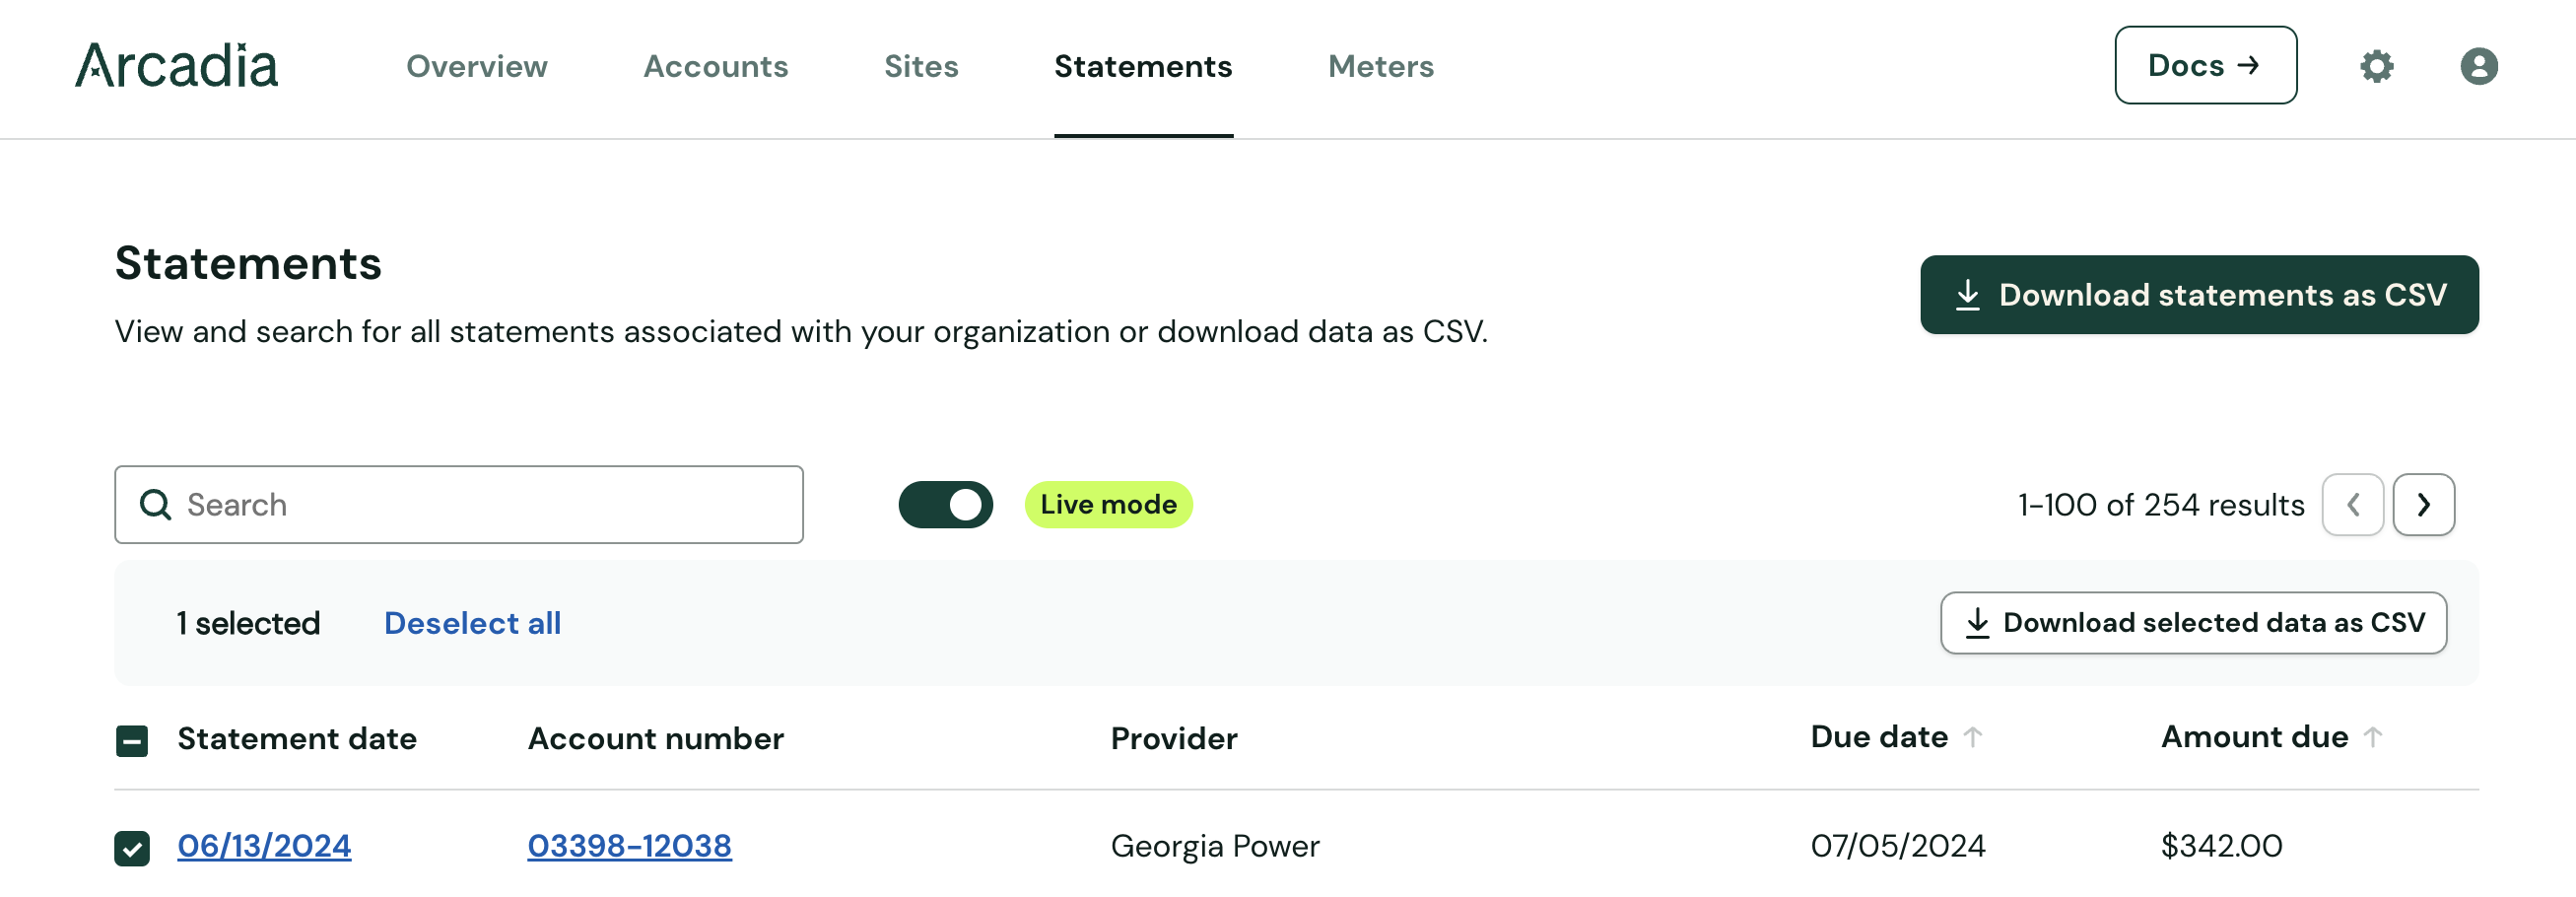
Download Behavior
To create a CSV download, navigate to the Accounts, Site, Statements, or Meters page. You can either initiate a download of all data or of a subset of your data.
To initiate a download of all data, click the “Download all data” button and enter the date range of your interest.
To initiate a download of a subset of data, you’ll need to check the box to the left of each row. You can select the checkbox in the table header to automatically select all entries displayed in the table, but please note that it only selects all the entries on the first page of displayed results. You can also narrow down the selection of data you want using a search filter. Once you check at least one box, a button will appear to download the selected Statement data. You’ll then need to select a date range for the entities you selected before the download will begin.
You'll be given the option of downloading in your browser or having the file emailed to you when it's ready. If you don’t have much data selected (fewer than a thousand rows), it's typically simpler and faster to download immediately in your browser. The download widget will select the best option for you by default, but you can always override.
Customized CSV Downloads
In addition to the default CSV download template options, you can also customize the table content by choosing which columns to make viewable in a given table. The columns that are viewable in the table will be included in the resulting CSV. A detailed walkthrough can be found here.
Deleting Data
Deletion of data is possible for the following kinds of entities:
- Credentials
- Bills
- Sites
When you delete a Credential or a Bill, the platform will also automatically delete all associated entities (Accounts, Meters, Statements) for those entities, unless they are still associated with another Bill or Credential. For Credentials, you may want to consider simply disabling extraction for the Credential so that you aren't billed for it in subsequent months, but it still exists in the platform in case you want to re-enable data access at another time in the future. When you delete a Site, associated Meters are not deleted; they are simply unmapped to the Site that is slated for deletion.
To delete an entity, you must go to the detail page for that entity. Click the trashcan icon in the top right corner of the detail page for the Credential, Bill, or Site. Follow the modal prompt to complete the deletion.
Site Mapping
Creating a Site
To create a Site, navigate to the Sites page and click the “Create a new site” button. Alternatively, you can create a Site and assign Meters to that Site simultaneously as described below.
Assigning Meters
Assign Meters to a Site by navigating to the Meters page and selecting one or more meters. You can optionally filter Meters first using a filter term as described here. A few action options will appear once a Meter is selected.
If the Site hasn’t already been created, you can click the button to add them to a new Site "+ New Site". Fill in the Site details and save the data to assign the Meters.
If the Site already exists, you can click the button "+ Assign to Site". Meters can only be assigned to one Site at a time so you’ll have to confirm the assignment if they are already assigned.
Connect Configuration
Connect URL
You may want to send a link to someone to have them enter a Credential into Connect. You can find the URL for Connect on the Connect Configuration page. You’ll notice there is a distinct URL for live and sandbox – unless you are a software developer, please don’t use the sandbox URL. Similarly, you’ll notice URLs for embedding Connect within an iFrame on a webpage – unless you are a software developer, we don’t recommend using those links.
Legal Agreements
If you are sending Connect out to users who may not be from your company, you likely want these users to agree to how you plan to use their data in your application. You can set URLs for links to your own terms of service and privacy policy on the Connect Configuration page. Just enter the URL you’d like in the respective text field and save. That link will now show up within Connect whenever it’s opened.
Appearance Customization
You cannot customize Connect's visual appearance in the Dashboard at this time.
Credential Management
Fixing Broken Credentials
At times, you may find that credentials that were submitted into the platform aren’t valid and we are unable to fetch data for those Credentials. In this case, you’ll want to correct the Credential as soon as possible. There are two approaches for fixing broken Credentials.
Health Overview Page
Utilize our health overview page to quickly isolate and address Credentials with issues. A detailed walkthrough can be found here.
Credential Page
The second option is to utilize the Credential page. First filter for Status: ACTION_REQUIRED in the Credentials page. Or, if you already know the username or correlationId of the impacted Credential, you can enter that in the filter box. Then, click each Credential that has an issue to view the Credential detail page. If you have access to the correct credentials, click the wrench icon to open Connect in a modal and submit the correct login information. If you need to collect the correct credentials from another person, click the "Generate Update Link" button to generate a URL for standalone Connect. Send the link to the right person so that they can navigate to the provided link and enter the correct login information for the Credential.
API Keys & Webhooks
API Keys and Webhooks are tools for developers to set up an integration with the API. If you are not a developer, you should not need to access these pages.
API Keys
You can set up API Keys on the API Key Configuration page. Select the button for "+ Create API Key" to get started.
Webhooks
You can set the URL at which webhook events will be delivered on the Webhook Configuration page. You can set a separate webhook endpoint for Live API events and Sandbox API events.
Editing User Profiles
To edit your name or email address, click the profile icon in the top right corner of the top navigation bar to open the sub-menu, then click Profile. Here you can edit your name or email address. Click "Save profile" to persist the changes. If you change your email address, you'll need to use the updated email address when you log in.
Team Management
To add or remove team members, click the configuration (gear) icon, then click "Team members". You can see all the members of your team in the table. Only admins can add or remove new team members. To add a new team member, click the "Invite" button, enter in your team member's full name, email address, and the permission levels like you'd like to give them, then hit the button to send the invite. To delete an existing user, click the the options button at the far right (three dots) and then click remove user. For users you've already invited but who haven't accepted their invite, you can use the same button to re-send their Dashboard invitation.
Live/Sandbox Modes
The Sandbox API mode is intended to help software developers who may not have access to a wide vary of Provider Credentials leverage dummy data in order to test their integration. On many pages within the Dashboard, you’ll see a toggle to switch between viewing Live data and Sandbox data. At this time, we haven’t published documentation on how to submit data into the Sandbox and don’t recommend you set this toggle to Sandbox mode. Keep it on Live mode.
Getting Help
If you are having trouble using the platform or see an issue with the data being delivered, feel free to create a support ticket using the button in the bottom right corner of every page of the Dashboard. Alternatively, you can send us an email at [email protected]).
Updated 12 months ago