
Dashboard Quick Start
How to quickly connect, view, and download data from the Dashboard
There are two ways you can interact with your utility data: via the API or via the Dashboard. This guide will walk you through the two main steps of accessing utility data via the Dashboard.
Step 1: Accessing the Dashboard
If you already have a legacy Utility Cloud account, you can access the Dashboard using your same username and password.
If you are a new or prospective customer, Arcadia will create a new organization for your team and send an email to you to enable access to the Dashboard. You will receive the email from [email protected] with instructions on how to finish setting up your account. The link in the email will send you to the Dashboard log-in page at https://dashboard.arcadia.com where you will be prompted to set your permanent password. You will then be able to log in to the Dashboard using that email and password you just set.
You can update your Dashboard password at any time by clicking the Reset Password link on http://dashboard.arcadia.com.
Step 2: Connecting utility accounts
In order to better understand how the platform works, we recommend that you first submit a utility credential into the system. You can do that by navigating to the Credentials configuration page. You can navigate there by clicking the relevant shortcut on the Overview page or by clicking Configuration (the gear icon) in the top nav bar and then selecting Credentials from the dropdown menu.
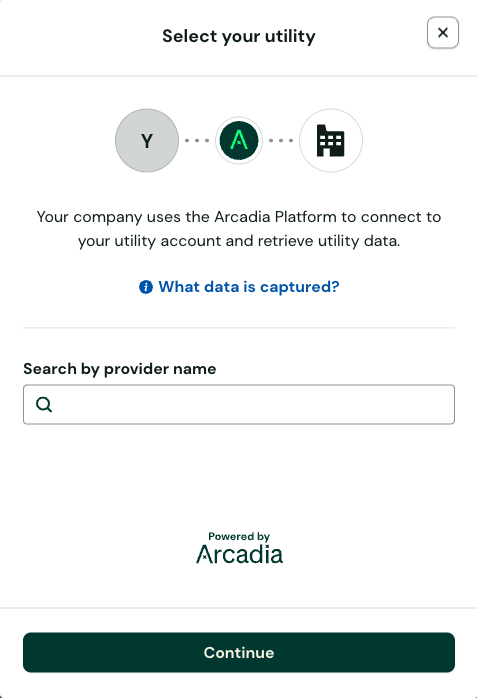
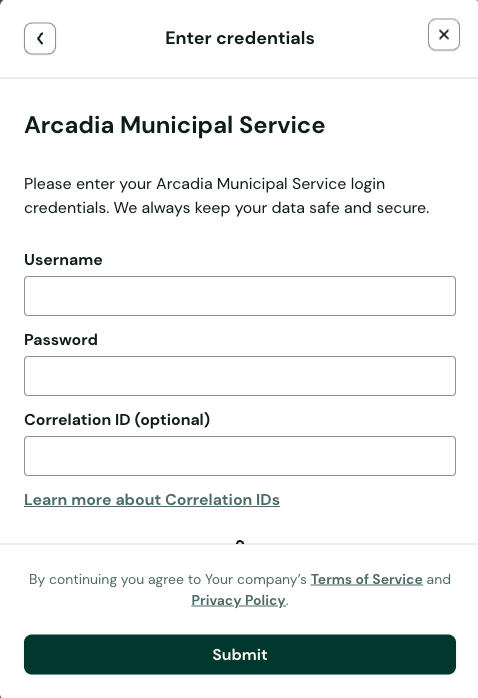
From here, you can click the button to “Add credential”. This will open what’s known as Connect – the UI component that handles provider selection and credential submission. Choose your utility provider and submit your credentials. Please note that ConEd has a unique integration and we’ll need advance notice that you want to integrate with their data stream.
Select a utility provider
Enter username & password
Data Processing
Once a credential is submitted, if we have the capability to validate the credential in real time (known as Real-time Credential Validation, or RTCV), Connect will indicate whether the credential is correct or not. For Providers without RTCV, you can close Connect just have credential submission and we’ll validate the credential asynchronously.
If the credentials are correct, we will begin automatically collecting up to the last 12 months of bills (unless you purchased extending history, at which point we’d collect more) except for customers who have opted to enrol for 'Discovered Accounts'. For such customers, once credentials are submitted, we discover all accounts & meters. Accounts will begin in a discovered state and must be activated by you, the customer, before Arcadia fetches and makes bills available. As we collect bills, we will automatically create new statement entries, new account entries, and new meter entries in the platform. Plug will automatically regularly collect new bills for all credentials unless the credentials or associated accounts have extraction explicitly disabled.
Optional Connect Configuration
Connect is a hosted web form that handles provider search, form validation and submission of data requests on behalf of your customers. You can customize many of Connect's features, including links to your Terms of Use & Privacy Policy, in the Dashboard.
To get started, embed the Connect URL into an email or web page. You can find the link for your particular organization on the Connect settings page of the Dashboard. For an internal test, connect one of your personal utility accounts, or send the link directly to coworkers. Connecting an account requires a user to select their utility provider and enter their username & password.
Optional Step 3: Uploading bills
If you don't have credentials to submit, you can start by uploading bills. We will automatically detect the provider on the bill and extract the associated accounts, meters, and statement data. To upload a bill, go to the Bill uploader section of the configuration section. Click the "Upload bill" button and either select the bill from your file system or drag your bill into the modal. Once you submit the bill, it will appear in the bill table in a pending state. Once it has been successfully processed, the table will provide a link to the produced statement in the Status detail column.
Optional Step 4: Associate meters with sites
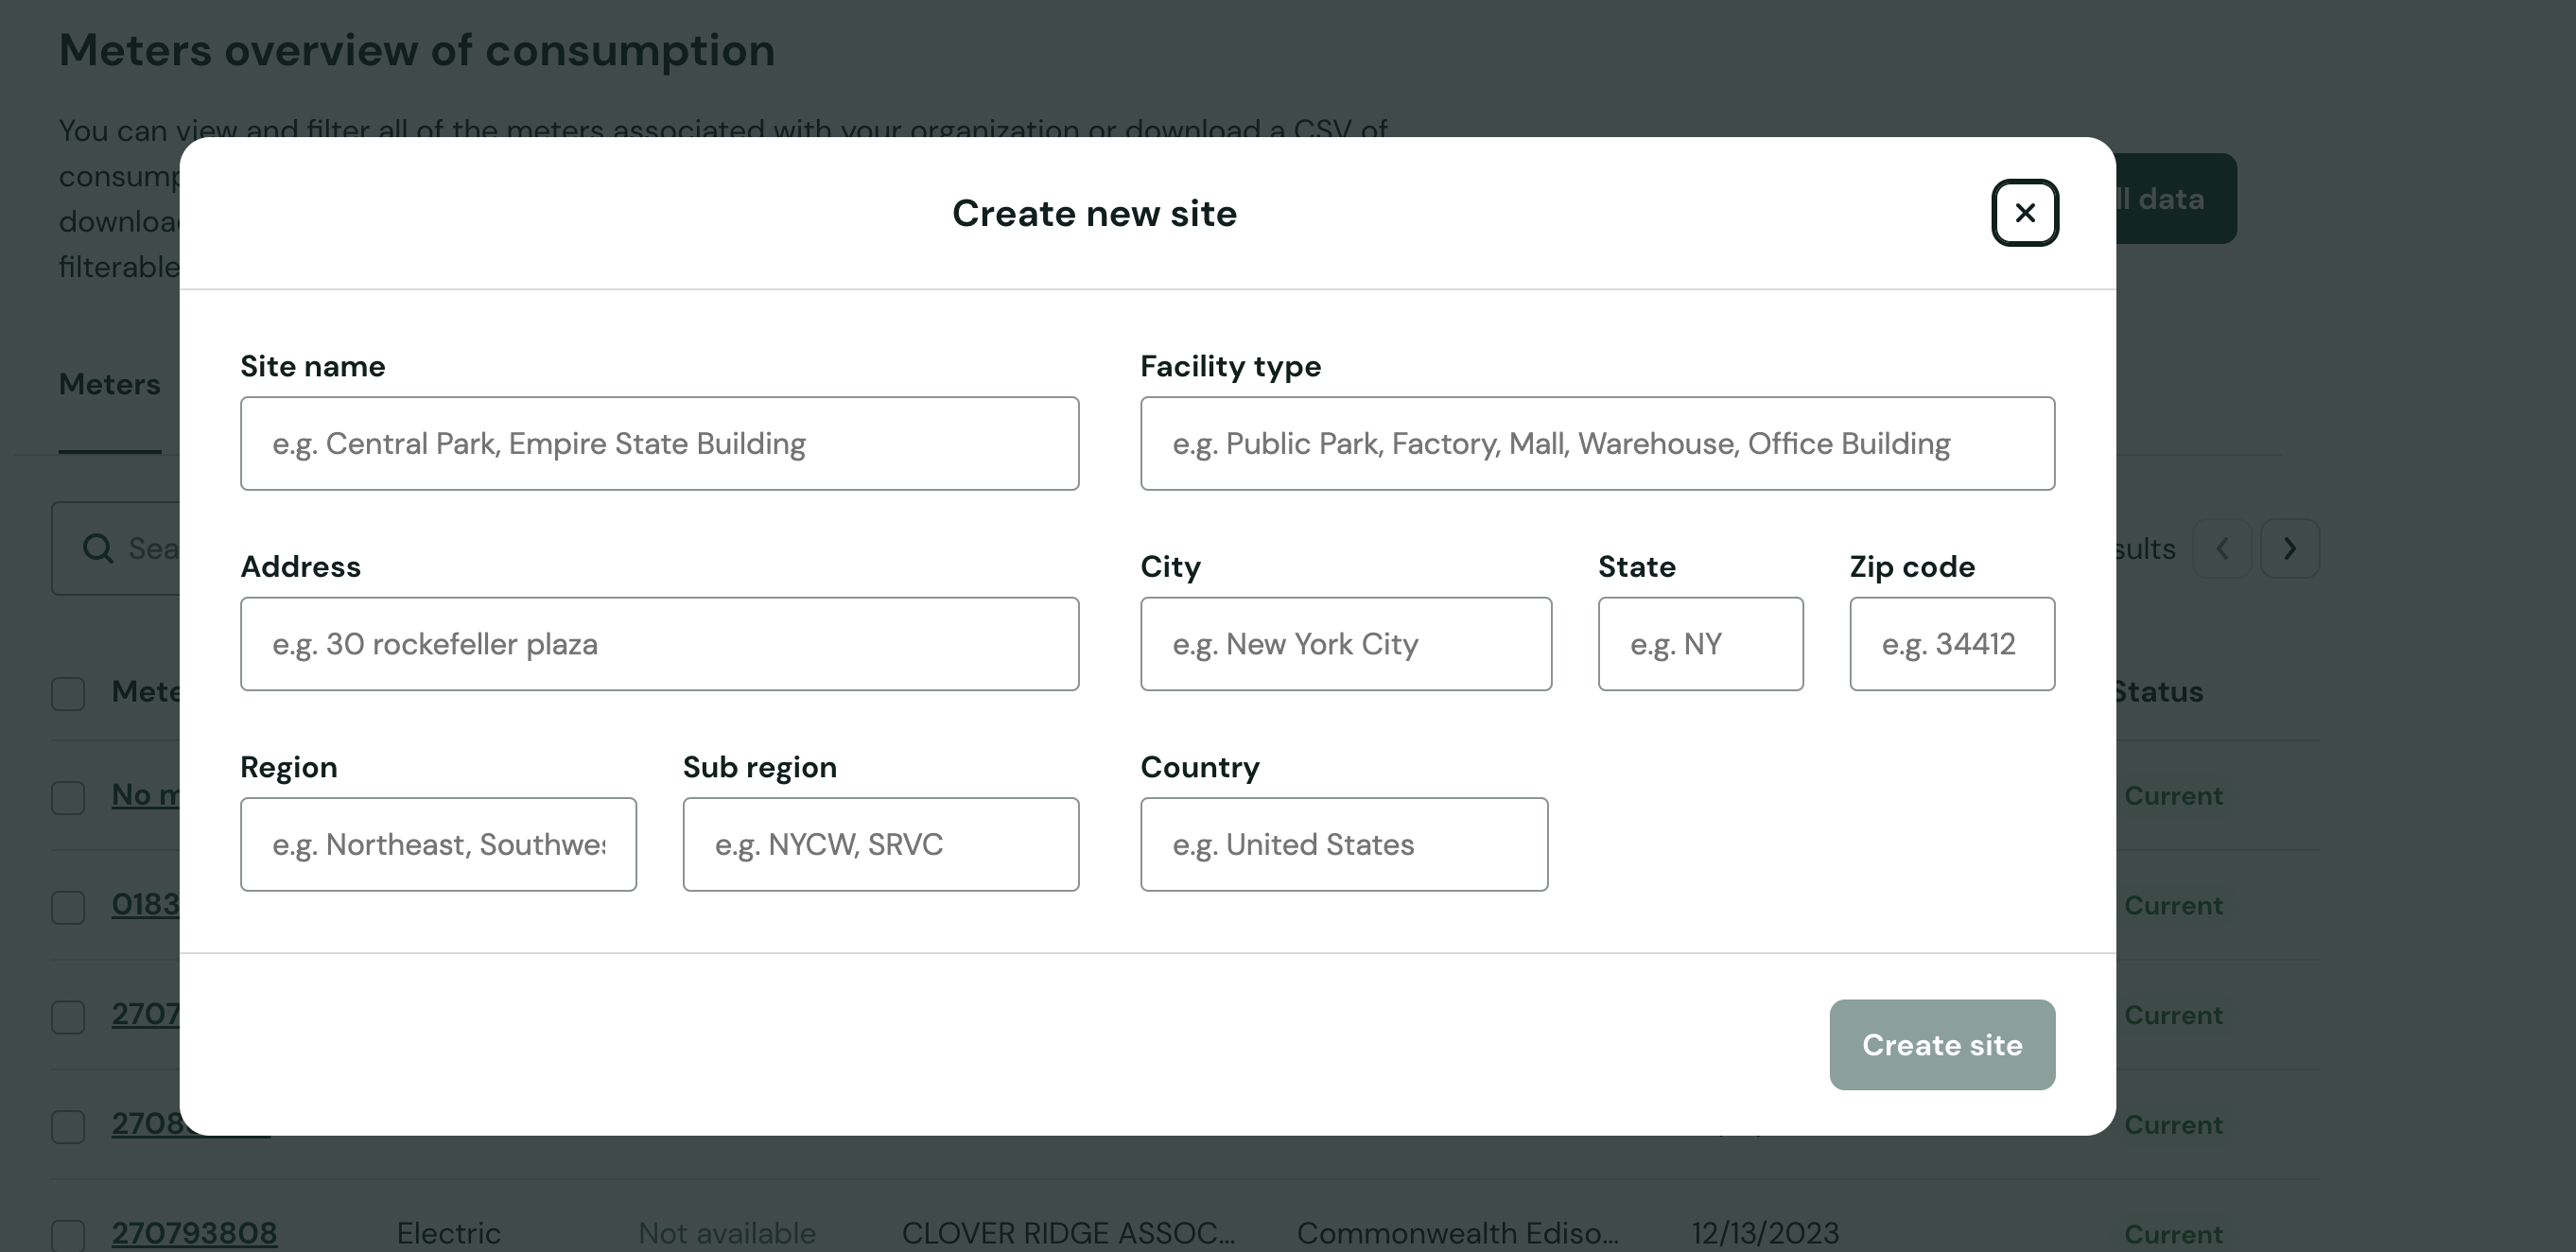
Once credentials have been verified or a bill has been uploaded, we will begin fetching all associated utility accounts, utility meters, and utility statements. You can assign meters to a site in order to group by a location or another logical grouping for your system. Each site can has a variety of fields where you can define values and tie these values back to records in your system such as name, address, facility type, region, etc.
You can create a site on the Site page by clicking the "Create new site" button. You must provide at least a name and the other fields are optional. Click the "Create site" button to complete site creation.
Then use the search box on the Meters tab to find the meters you want to add to your new site. Select the meter's checkbox and click the "Assign to site" button that appears under the search box to open a modal to search for a site. Search for the site you made and click the button to confirm the assignment.
Step 5: Viewing utility data
Once credential submission is complete and we have finished extracting its associated data, you can view the data across various pages in the Dashboard: Sites, Accounts, Meters, and Statements. Clicking the linked fields in the tables will take you to the detail page for the meters, sites, statements, or accounts. These detail pages will display the most pertinent information about that resource.
Step 6: Downloading Statement PDFs
You can download a statement's source PDF by navigating to the Statements page, filtering the table for the statement you're interested in, then clicking the date link of the statement you're interested in. This will take you to the statement detail page where you can click the link to download the original statement source PDF.
Step 7: Downloading CSVs
If you'd like to download a CSV of summary level data of all statements in the system, click the "Download statements as CSV button on any of the Sites, Accounts, Meters, Statements, or Providers pages. Then select the date range of interest, and finally decide if you want data emailed to you or downloaded in the browser. Large data downloads can take a long time to process so we recommend email delivery if you click "Download all data" and have hundreds of accounts or more.
If you'd like to download data for a subset of data, check the boxes next to the rows of data you are interested in before clicking the "Download selected" button. Select whether you want the download in browser or via email. You can use the search box to filter down the rows in the table. Click the search box to see available filters, select the filter you'd like, and then type the term you'd like to filter by. The search is fuzzy so, for example, if you select a Service Address filter for meters and type in "Pear" then meters with a service address of "123 Pear St" would be displayed. You can also sort select columns A-Z or Z-A for convenience.
Updated 9 months ago